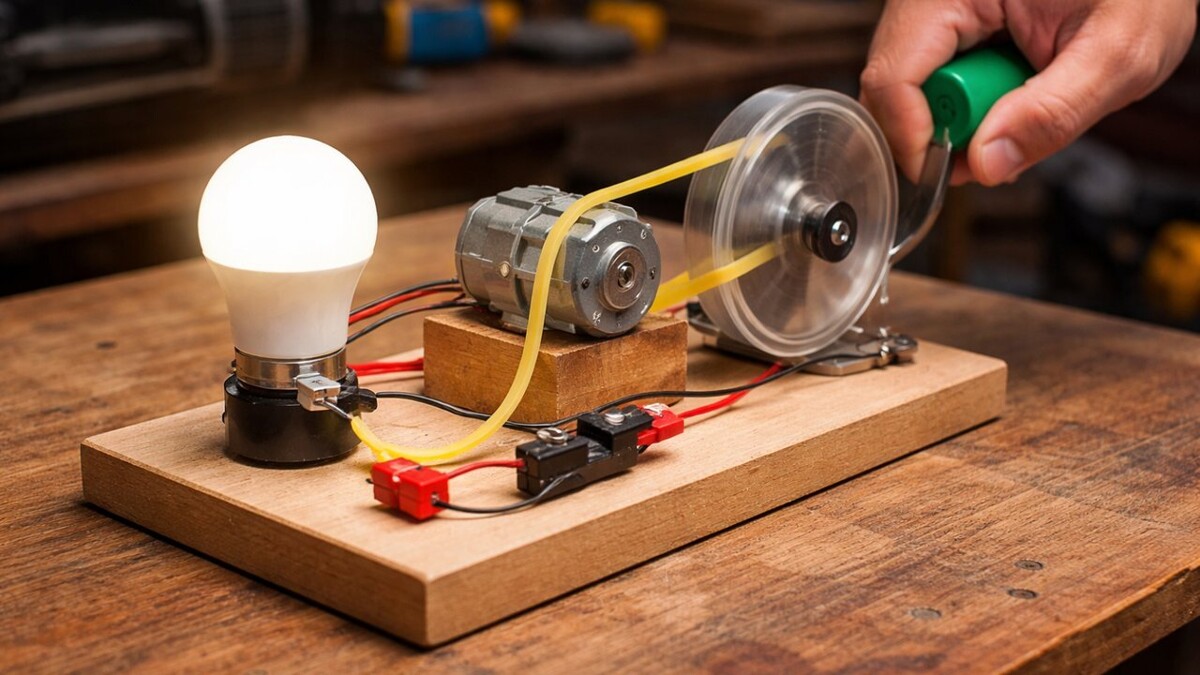
How to Build a Homemade Electric Generator For a simple generator, the following materials are common: a small DC motor (from an old printer, toy, or disassembled tool), CD discs as lightweight wheels to create a pulley or flywheel, cardboard, wood, or a rigid base to mount the motor, an elastic band or belt to transmit rotation, electrical wires and connectors, a small LED bulb or spotlight to test the generation, and a switch and insulating tape for safety.
Step-by-step guide to assembling a generator:
-
Prepare the base: Secure the DC motor onto a stable base (reinforced cardboard, lightweight wood, or a rigid box).
-
Mount the pulley or flywheel: Use CD discs or an improvised flywheel attached to the motor's shaft. This helps generate more torque when spun.
-
Connect the elastic band: Stretch the elastic band between the motor's pulley and a larger crank or wheel that you will turn by hand or with a simple system (e.g., pedals or a crank).
-
Install the output circuit: Solder or connect wires from the motor's terminals to the LED spotlight or your test device, integrating a switch to control it.
-
Test the generator: Manually turn the crank. The rotation transmitted to the motor induces a small electric current that should light the LED if the connections are correct.
Usage and safety tips This type of generator does not replace a powerful commercial one, but it can be sufficient for small loads (lights, radios, or charging batteries with a suitable circuit). Work with tools and wires safely: insulate connections, avoid short circuits, and do not exceed the load capacity that the motor or wires can handle.
This cheap generator, made in a few simple steps, is ideal as an educational project, an emergency solution, or a first approach to the world of home energy.